Tutorials
Using FTP (File Transfer Protocol)
At some stage, in your blog-self-hosting voyage of discovery, there’s going to be a need to move files from your PC, to the server where your blog is hosted, and perhaps back down again, too. There’s an app for that. It’s called, in that lovely, blindingly obvious techno-jargon, “File Transfer protocol”, or FTP. It’s a lot less scary than it sounds, so lets take a plain-English-look at using FTP to move files to and from your website.
Using FTP, is a lot like using your computer’s file manager to copy and move files around locally. So, when you copy all those pictures from your local drive to your external backup drive? Just like that. Except, this external drive (the server) is REALLY external. On another computer. In another country, maybe even. And it has this thing about letting strangers copy stuff on or off, so you need to have permission, and say who you are. All simple so far, right?
So, as we said, there’s an app for that. In fact there are many. Too many to make this tutorial useful if we tried to cover them all, in fact. So we’ll just use one as an example. But that’s okay, because this one has a lot going for it:
- It’s free.
- It has Mac, Linux and Windows versions.
- It’s simple, no-frills software.
- It’s pretty much bullet-proof.
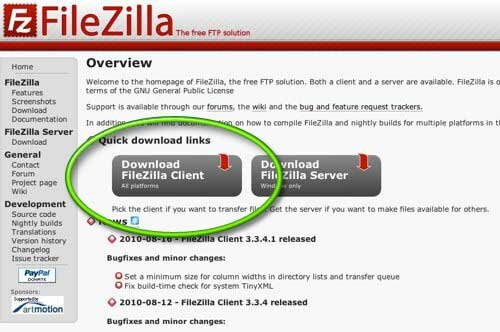
This paragon of FTP-goodness is called , and you can get a copy for your own use, by clicking on the “Download Filezilla Client button:
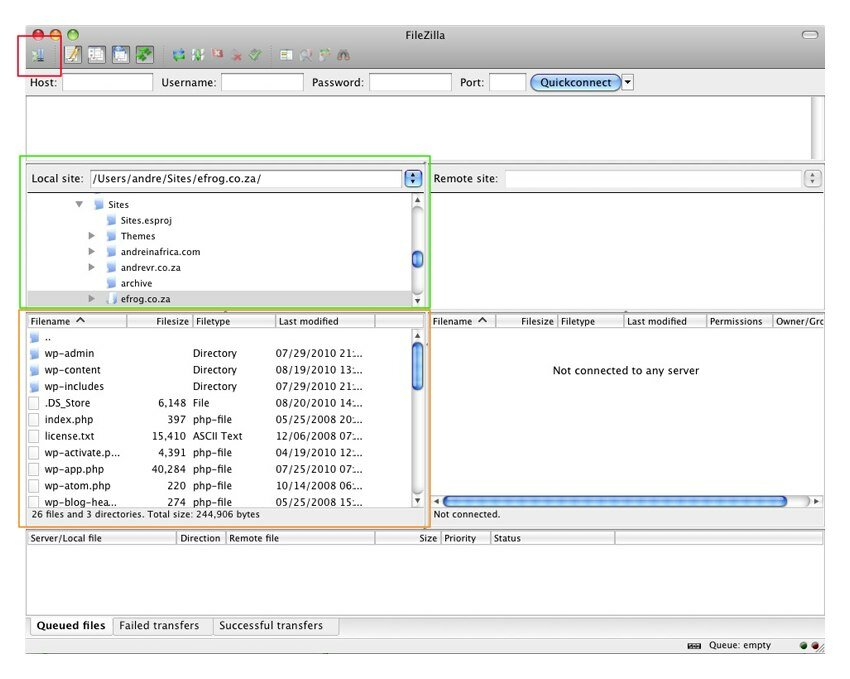
Once you’ve downloaded and installed Filezilla, and opened it up, this is what you’ll be looking at. Various versions for different operation systems have small differences, but they’re visually very similar, and functionally the same.

We’ve highlighted three interesting areas.
The little computer icon, top left, in the red box, is the Site Manager. Think of this as an address book, to all your favourite FTP sites, which makes it easy to connect to them with a single click, and takes care of remembering the names and passwords that you need, to get you into each site.
The green and orange boxes show the directory structure and folder contents of your local drive. These areas are customisable, but for now, lets just use them, as they are.
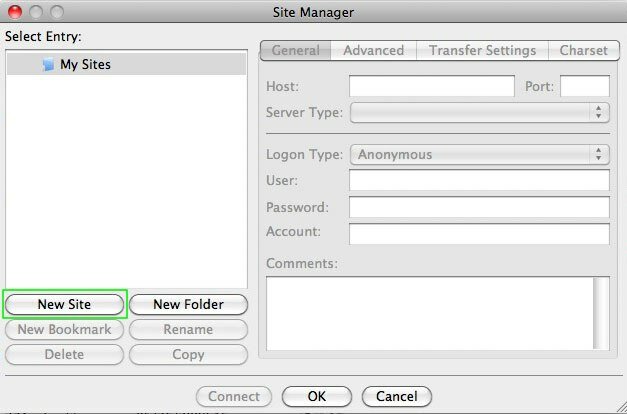
We want to configure FileZilla to connect to your website, so go ahead and click on the site manager icon (in the red box). This is what you’ll see:
Now click on the “New Site” button (outlined in green). The contents of the Site Manager window will change.
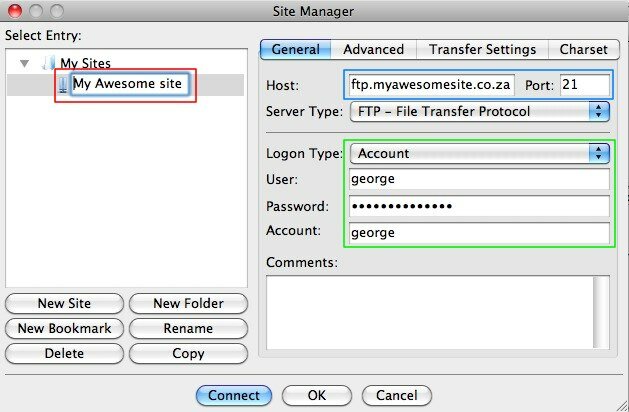
Now, we’re going to enter the details of your website, and save the entry. The good folks at your hosting service will have e-mailed you these (and other) details when you signed up. Here we go!
- Give the site a recognisable name. (In the red block)
- Enter the host address. This looks like the web-address, but will most likely start with ftp instead. Use the default FTP port, 21. (In the blue block)
- Choose the “Account” option in the “Logon Type” drop-down list, and then type in your username and password login details. Hope you have a strong password like George! (In the green block)
- Enter the same username in the “Account” field. (In the green block)
- Click “Connect” to save the site details, dismiss the dialog box, and connect to your site.
You’ll see a bunch of commands and stuff scroll up in the top pane (red block), and if all is good, the filesystem of your website will appear in the right hand panes (green block). Yay!
Now, depending on which system your hosting service is using, the folder system will look a little different. The two big players are:
- CPanel
- Plesk
If your host is using CPanel, your website will live in a folder called public_html. If they use Plesk, it’ll be in httpdocs. If you don’t see either of these, and/or the details e-mail from your host is not clear, you should speak to them before proceeding. We’ll assume all is good, and continue.
Open your upload directory (public_html or httpdocs) by double-clicking the folder (orange box above). You’ll see that there are already some files and folders there. Don’t be concerned.
Now, using the left hand pane, navigate your local hard drive, to find the files or folders that you want to upload.
We’re going to use a single file, “index.php” as an example, but multiple files and folders work just the same. Left-click-and-drag the file from the left-hand (local) side, to the right-hand (remote) side, and drop it there.You’ll see some messages scroll in the top pane again, and boom! The file is uploaded.
Congratulations! Using Filezilla and what you’ve learnt here, you’ll be able to upload any files you need to, to your website.


